How to Paint a Roof - Roof Painting Tips & Guide

The roof of a property is undeniably the most integral part of a house, but also the first to show wear and tear if not properly maintained. The strength, resistance and stability of a roof will define a home, as much as the foundations will.
So it’s surprising how often homeowners neglect maintaining their roofs, allowing mould, dirt and leaves to build up. Not to mention damage from the sun and storms that are left untreated. To protect against water and other environmental damages, the painting of a roof plays a vital role.
The high UV in Sydney and it’s suburban areas is just one factor that a proper paint job can help protect against. Doing the job right the first time will also impact how often you need to touch up your roof, as frequent work and repainting are just as expensive as it is an inconvenience.
The article below will explore the roof painting process step by step, offering tips and tricks along the way. Let’s begin.
Step-1: Roof Inspection
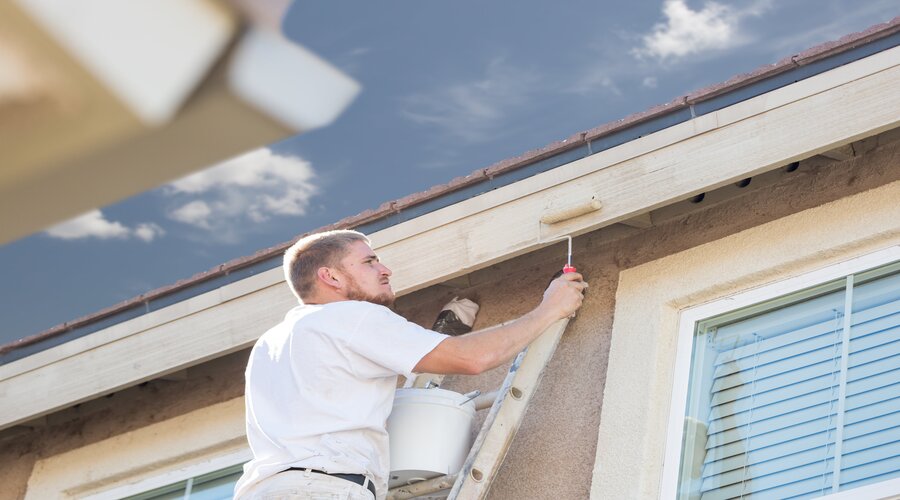
Before carrying out any interior or exterior roof painting, professional or DIY, the first step is to check the current condition of the roof. Rushing to start the job without thoroughly inspecting the area can end up delaying the process and even incurring expensive repairs and a repaint. That’s why the first step is always to have a professional inspect the roof inside and out.
Interior Inspection:
In order to get a full report of any damage, we recommend inspecting both the exterior and the roof from the inside, by going to the attic and examing for water damage. This damage includes any trails, stains, dark spots or mould and mildew. Once the damage is established, a professional surveyor will be able to walk through and note the extent of the damage and recommend professional and reliable roofers to assist.
Exterior Inspection:
While inspecting the exterior of a roof, look for any damaged shingles, any blistering and mould or algae growth. To control fungal growth, we recommend zinc or lead control strips. After checking the shingles, move on to any metal parts of the roof and check for rust.
To remove rust, use a coat of primer and metal paint with wire wool. Overall, make sure there are no loose or damaged elements close to any vents, pipes or chimneys. For damaged joints and chimneys, use soft caulk or mortar around the area. Last but not least, check if all the roof supporting materials, timbers, harnesses and scaffolding for signs of termites or other pests.
Step-2: Roof Cleaning and Sterilising

Once the inspection is done, and all damage is repaired, the next step is to rid the roof of any dirt, leaves and mould. Skipping this step will result in a poor paint job with mould continuing to grow out from under your new paint. A well cleaned and prepared roof surface assures durability, superior adherence and paint longevity.
The initial cleaning step will depend on the roof condition. If the roof is new and correctly built, a thorough rinse with a pressure washer will usually suffice. For more worn areas, an overnight biocidal wash and disinfectant spraying will remove any fungal growth and erosion. A file brush can also be used to remove dirt from roof joints.
Step- 3. Sealant Application
The next step is to apply sealant; this is done to protect roofs from extreme weather, UV and other outdoor elements. Additionally, roof tiles tend to absorb more paint than other tiles or surfaces as well. Professional painters or constructors will strictly apply a sealant for the following benefits-
- UV Protection: Without any reflective technology, roof shingles are heavily affected by ultraviolet rays, causing degradation and damage. Roof sealing or coating with reflective elastomeric will protect the roof from UV.
- Fire-Resistance: Some specific roof sealants can also act as fire-retardants, significantly paired with a metal roof.
- Heat and Cooling Cost Reduction: In many cases, roof sealing with reducing heat and cold air escaping as well as reducing and cooling costs through cooling sealants.
- Waterproof: Rubber (elastomeric) or silicone roof sealants with relatively low permeability are broadly used to protect against moisture growth.
Step-4: Right Roof Coating Selection
There’s a subtle difference between painting and coating. More often than not, surface or roof painting only implies an aesthetic improvement or embellishment. Coating, on the other hand, boosts surface performance, colour retention and durability. Therefore, choosing the right roof coating is essential.
Roof coatings are thicker and are specifically formulated to protect the roof surface from UV exposure, extreme weather, rapid change in temperature swings and other external factors. Using the right coating will extend the durability of the roof. There are commonly four types of roof coatings: acrylic, silicone, asphalt and polyurethane.
Acrylic coatings
Acrylic coatings are solvent-based emulsions, used on the many different types of roofing. Acrylic coatings are very versatile with outstanding resistance to the environmental factors. The downside, however, is that the coating comes in a limited range of colours.
Silicone coatings
Silicone coatings are very thick and highly elastic, meaning they provide excellent adhesion and oxidation resistance. Unlike acrylic coatings, silicone rooftop coatings are available in many colours and come with high reflectivity to protect against UV rays. This adhesion and colour range make them the popular choice for roofing.
Asphalt coatings
Asphalt coatings are also solvent-based emulsified substances but are formulated with greater waterproofing. These coatings can be both fluid and cold-process applied. In terms of colour, asphalt coatings are usually either black or aluminised, as they are often used with other asphalt roof materials.
Polyurethane coatings
Just like asphalt coatings, polyurethane coatings are also solvent-based coatings with high abrasion resistance and foot traffic. Polyurethane coatings come in 2 types: aromatic and aliphatic, both of which are used for commercial roof preparation.
Step-5: Preferred Roof Painting Method Selection
With the coating stage out sorted, the next step is to decide on a painting method. Dulux accredited painters can help in selecting the right roof painting method out of the standard options listed below or suggest something more specialised depending on the project.
Paint Brush Method
One of the most traditional and budget-friendly applications is the paintbrush method. Using a range of brushes will ensure an even coat using the least amount of paint.
Roller Paint Method
The roller-paint method is a great alternative to the paintbrush method, requiring less time and tools. This method, however, can get messy and should be handled by a professional to ensure an even application with no splatter. If attempting the roller paint method, different width rollers should be used for different surfaces.
Spray Paint Method
The spray paint method is usually used in commercial painting as various machines like airless paint sprayers or high-pressure paint spray guns are utilised. This method is very time-efficient as it can cover a large area in little time.
Step-6: Roof Paint Application
The final step of roof painting is the correct application of the paint. Below we’re discussing the different paint types and how suited they are to each surface. The two most common types of roof paints are water-based and oil-based. Water-based roof paints better suit shingle roofs or cement tiled roofs, while oil-based, pigments are used for iron or metallic roofs.
Nowadays, many paints have thermal additives and weather-proofing technologies for added protection along with the sealing and coating.
If unsure of what paint to use, always consult with a professional painting service for a full rundown of the best application.
Unlike other surface painting, roofs can pose quite a challenge, requiring specific industry applications for longevity and the right materials for protection. For technical expertise and understanding, the Dulux accredited Premier Painting Company can help with your project in Sydney. Get in touch today to start the discussion.


.png)
.png)